Create an Azure Key Vault Resource – Keeping Data Safe and Secure-1

- Log in to the Azure portal at https://portal.azure.com ➢ click the menu button on the upper left of the browser ➢ click + Create a Resource ➢ select Security from the Categories section ➢ select Key Vault ➢ select the subscription ➢ select the resource group ➢ enter a key vault name ➢ select a region ➢ and then select a pricing tier (I used Standard). Leave the remaining options as the defaults.
- Click the Next button ➢ leave the defaults on the Access Policy tab ➢ select the check box next to your user identity in the Access Policies section ➢ click the Edit button ➢ observe the default Key, Secret, and Certificate default permissions ➢ click Next ➢ leave the defaults on the Networking tab ➢ click the Review + Create button ➢ and then click Create.
- Once the key vault is provisioned, navigate to it ➢ select Keys from the navigation menu ➢ select the + Generate/import menu link ➢ and then enter a name (I used brainjammerKey). The configuration should resemble Figure 8.2. The Elliptic Curve Name radio buttons show the available algorithms.
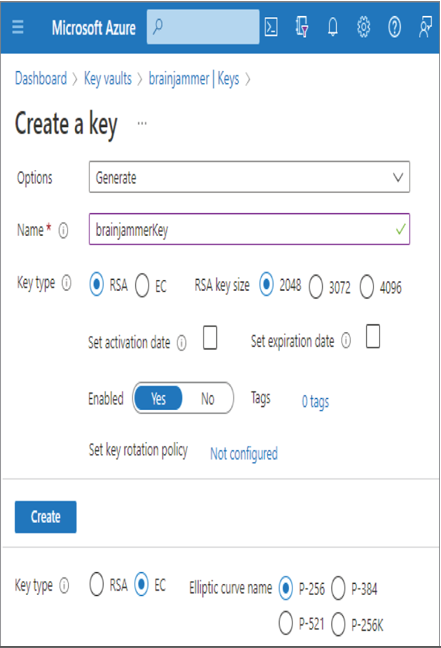
FIGURE 8.2 Creating an Azure Key Vault key
- Click the Create button ➢ select the Secrets navigation item ➢ click the + Generate/Import menu option ➢ enter a name (I used azureSynapseSQLPool) ➢ and then enter a secret value (I used the password of my Azure Synapse Analytics dedicated SQL pool). The configuration should resemble Figure 8.3.
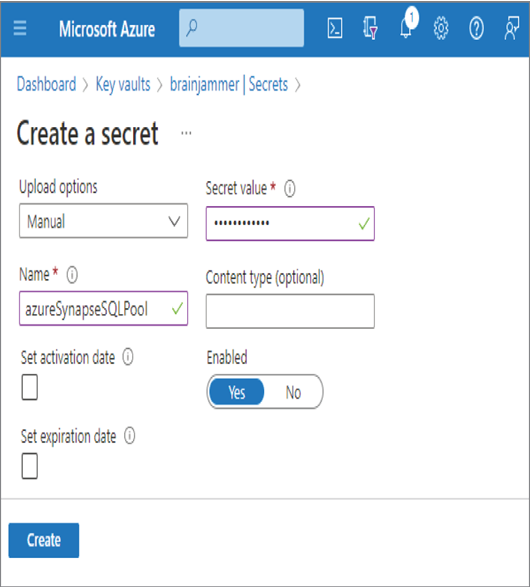
FIGURE 8.3 Creating an Azure Key Vault secret
- Click the Create button ➢ select the Certificates navigation item ➢ click the + Generate/Import menu option ➢ enter a certificate name (I used brainjammerCertificate) ➢ and then enter a subject value (I used “CN=brainjammer.net”). The configuration should resemble Figure 8.4.
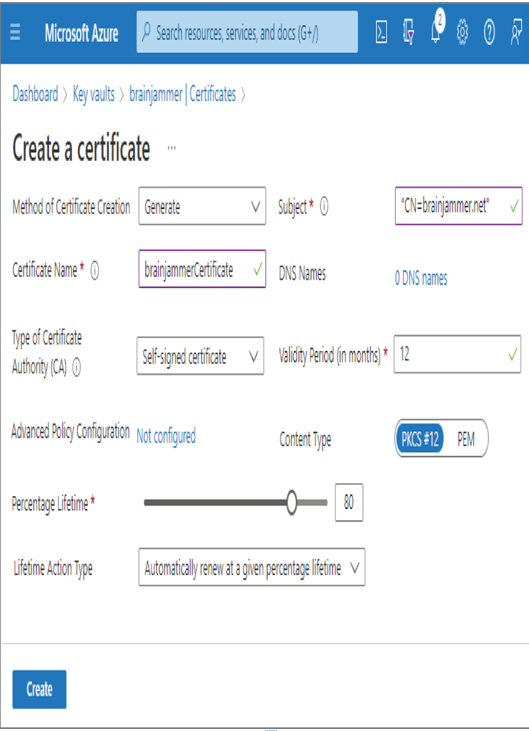
FIGURE 8.4 Creating an Azure Key Vault certificate
- Click Create.
Exercise 8.1 is straightforward in that you should recognize most of the options and understand what they mean. A few features and concepts, however, are worthy of discussion. On the Access Policy tab, you likely noticed the option to manage access by either Key Vault access policy or Azure role‐based access control (RBAC). The Key Vault access policy enables you to grant service principals, users, applications, or user groups access to specific operations on the keys, secrets, and certificates hosted in the key vault—for example, those shown in Figure 8.5. Figure 8.5 is similar to what you saw in step 2 of Exercise 8.1 when viewing the default permissions.
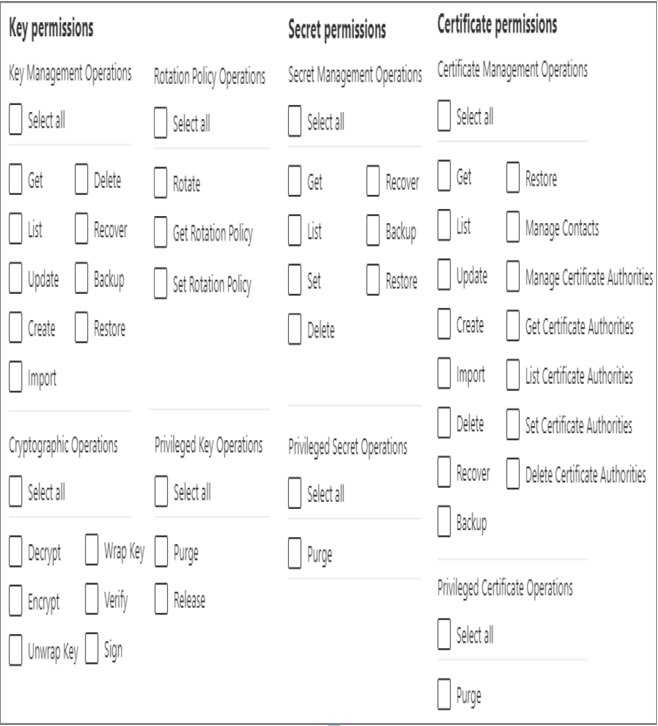
FIGURE 8.5 Vault access policy operations
With the RBAC approach, you grant a user or group access to the key vault using a role. There are numerous built‐in key vault roles, such as Key Vault Administrator, Key Vault Reader, and Key Vault Secrets User. If any of the built‐in roles do not meet your requirements, you can create a custom role, using a JSON document similar to the following:
Leave a Reply